[Flutter] TextFormField을 Custom하여 사용하기.
반응형
작업을 하다보면 TextFormField는 자주 쓸 수밖에 없는데, 이때 디자인을 수정해야 할 때가 있다.
그때를 대비하여 Custom하는 방법에 대해서 설명한다.
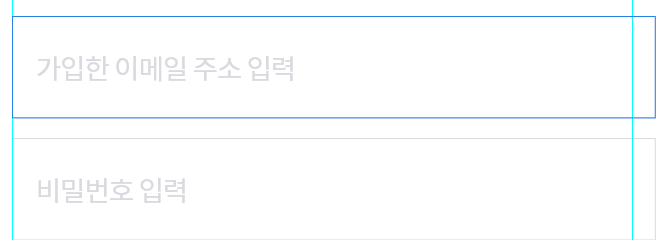

back에 label색상과, 글씨가 써지면 보여져야하는 삭제버튼, 삭제버튼에 따라오는 기능, 숫자만 입력하는 기능.. 이메일 입력..등 상당히 많은 부분을 작업해야 하는데 이럴때 Custom하여 하나의 객체로 만들면 편안하다.
첫째로 해야하는건 클래스를 생성하는것이다.
당연하게도 상태가 변화함에 따라 새로 그려져야 하므로 StatefulWidget을 사용하면 된다.
그리고 Container안에 Stack을 통해 각기 위젯을 겹쳐두고 입력에 따른 기능을 추가하면 된다.
소스코드
더보기
class CustomTextField extends StatefulWidget {
  final TextEditingController controller;
  final String labelText;
  double? width;
  final EdgeInsetsGeometry? margin;
  final bool isObscure;
  TextInputType? type = TextInputType.none;

  CustomTextField({
    required this.controller,
    required this.labelText,
    required this.margin,
    this.width = 654,
    this.isObscure = false,
    required this.type,
  });

  @override
  State<StatefulWidget> createState() => _CustomTextFieldState(
        labelText: labelText,
        controller: controller,
        margin: margin,
        width: width!,
        isObscure: isObscure,
        type: type,
      );
}

class _CustomTextFieldState extends State<CustomTextField> {
  final TextEditingController controller;
  final String labelText;
  String label = '';
  double width;
  final EdgeInsetsGeometry? margin;
  final bool isObscure;
  bool isIconVisible = false;
  TextInputType? type = TextInputType.none;

  _CustomTextFieldState({
    required this.labelText,
    required this.controller,
    required this.margin,
    required this.width,
    required this.type,
    this.isObscure = false,
  }) {
    this.label = labelText;
  }

  void onChangedEvent(String value) {
    print('customTextField onChagendEvent');
    controller.text = value;

    if (value.length == 0) {
      label = labelText;
      isIconVisible = false;
    } else {
      label = '';
      isIconVisible = true;
    }

    setState(() {});
  }

  @override
  Widget build(BuildContext context) {
    // TODO: implement build
    return Container(
      margin: margin,
      width: width,
      decoration: BoxDecoration(
        border: Border.all(
            color: fontColorlightGrey, width: 1, style: BorderStyle.solid),
      ),
      child: Stack(
        children: [
          Positioned(
            child: Container(
              padding: EdgeInsets.only(left: 20),
              height: 104,
              alignment: Alignment.centerLeft,
              child: Text(
                label,
                style: const TextStyle(
                    wordSpacing: -3.5,
                    color: fontColorlightGrey,
                    fontSize: FONT_SIZE_28),
              ),
            ),
          ),
          Container(
            height: 104,
            alignment: Alignment.centerLeft,
            child: TextFormField(
              keyboardType: type,
              obscureText: isObscure,
              controller: controller,
              style: TextStyle(fontSize: FONT_SIZE_28),
              onChanged: (value) => onChangedEvent!(value),
              decoration: const InputDecoration(
                counterText: '',
                border: OutlineInputBorder(
                    borderSide: BorderSide(style: BorderStyle.none, width: 0)),
              ),
            ),
          ),
          Positioned(
            right: 0,
            child: isIconVisible
                ? Container(
                    height: 104,
                    padding: EdgeInsets.only(right: 10),
                    alignment: Alignment.centerRight,
                    child: IconButton(
                      onPressed: () {
                        onChangedEvent!('');
                      },
                      icon: const Icon(
                        Icons.cancel,
                        size: 40,
                        color: fontColorSuperlightGrey,
                      ),
                    ),
                  )
                : Container(),
          ),
        ],
      ),
    );
  }
}
다만 이렇게 작성하면 Textfield를 호출하는 상위 위젯에서 Textfield의 값에 따른 변경을 체크해야할 필요가 있으므로
Controller에 listener를 붙여서 해결하면 된다.
간단간단
소스코드
더보기
@override
void initState() {
  // TODO: implement initState
  super.initState();
  passwordController.addListener(() {
    if (emailController.text.length > 0 &&
        passwordController.text.length > 0) {
      loginBtnColor = mainThemeColorBlue;
    } else {
      loginBtnColor = fontColorlightGrey;
    }
    setState(() {});
  });
  emailController.addListener(() {
    if (emailController.text.length > 0 &&
        passwordController.text.length > 0) {
      loginBtnColor = mainThemeColorBlue;
    } else {
      loginBtnColor = fontColorlightGrey;
    }
    setState(() {});
  });
}
반응형
'Study > Flutter' 카테고리의 다른 글
| [Flutter] Flutter blue Plus 1.30.7 버전 기준 연결 예제 (0) | 2023.12.26 |
|---|---|
| [Flutter] 플러터에서의 Database연동 및 API 통신 (0) | 2023.08.17 |
| [Flutter] SharedPreferences를 사용한 자동 로그인 구현 (0) | 2023.08.16 |
| [Flutter] 다국어 지원 (0) | 2023.07.05 |
| [Flutter] 플러터 블루투스 연결 구현 #5 Notify, Write 구현 (0) | 2023.03.10 |


댓글